At one time the General Competition Rules did not require that a Formula Continental chassis have something referred to as an anti- intrusion panel. The current rules do.
I had no idea whether or not converting the RF94 to accommodate the Zetec powerplant would void the “grandfathered-in” status of the side body panels, but I felt that, if the current rules were requiring the Kevlar panels, it wouldn’t hurt to see what needed to be done, learn how to do it, and then do it. In addition, if I decided at some point to continue playing with the motor and its components, I realized that the car would then get booted out of Formula Continental and into the Formula S/Formula Libre category. It is very clear that the SCCA does require that a Formula S car have at least a double layer of 5 ounce, bi-directional, laminated material incorporated into the body panels on either side of the driver compartment (defined as the area from the lower frame rail to the upper frame rail extending from the instrument/dash roll hoop bulkhead to the rear roll hoop bulkhead).
I purchased four yards of Kevlar cloth from Rock West Composites in San Diego and the special heavy duty serrated shears needed to cut it. The Kevlar cloth cost $46.79 a yard. The heavy duty shears were $63.99.
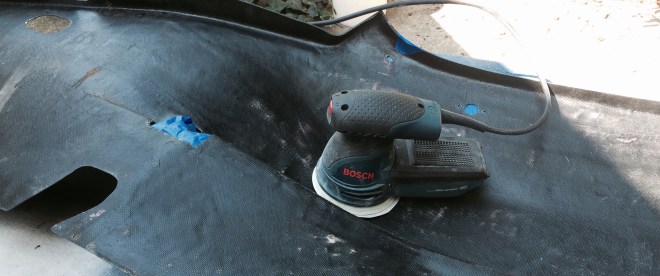
The first task was to thoroughly sand the inside of the side body panels in that area between the specified bulkheads. A Bosch Random Orbital Sander (available everywhere for $70-$80) aided the task.
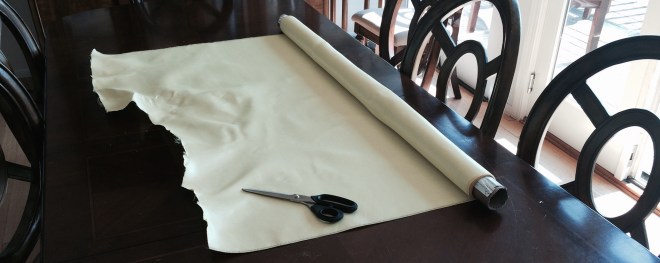
With the dining room table as a cutting surface…..

………I then set about cutting kevlar cloth pieces to fit in and around the shapes and sections of the specified interior bodywork surfaces.

Then, at the suggestion of a sailing friend, I went to West Marine to purchase the necessary resin and hardener. The System 105 Epoxy Resin was recommended for Kevlar applications ($94.99 for the 126.6 fl.oz. size). The 205 Hardener was similarly recommended ($44.95 for the 27.5 fl.oz. size). West also provided a Mini Pump Set that would precisely deliver the Resin and Hardener in the correct 5 to 1 proportions ($17.99).
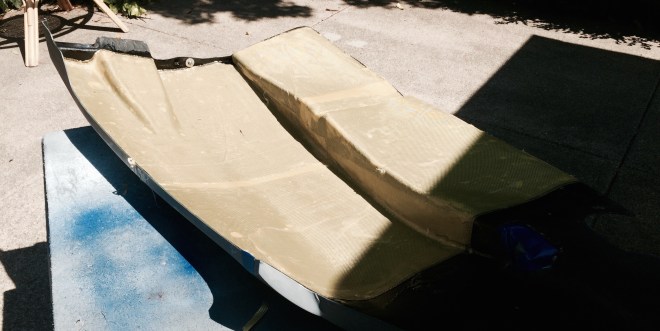
Mixed the resin and hardener as required. And then working with relatively small sections (the hardening time is but 9-12 minutes once the resin and hardener have been mixed together), I liberally applied the mixture using both a disposable paint brush and a roller specific for the task. I tried to make sure that the cloth was saturated and that I’d removed as many bubbles as possible. You Tube videos helped me visualize the process.

I let everything dry and harden for a day and then repeated the process for the second Kevlar layer.
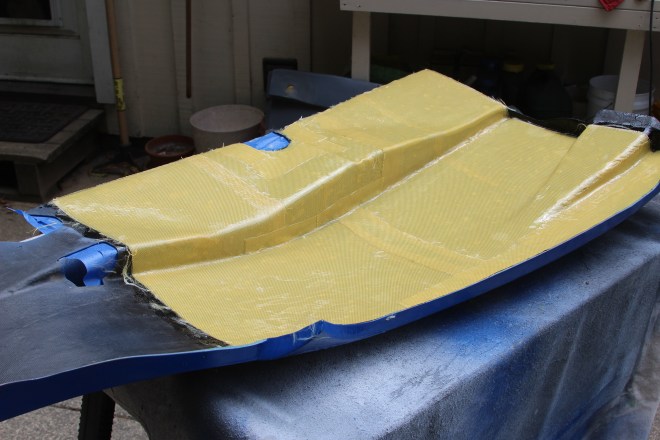
Once the second layer had hardened, I set about removing and cutting away the extraneous threads and bits and pieces.
I also brought out the drill to make certain that any mounting holes that had been covered by the Kevlar fabric were re-opened.
